Showing posts with label DIY. Show all posts

Tuesday, August 13, 2013

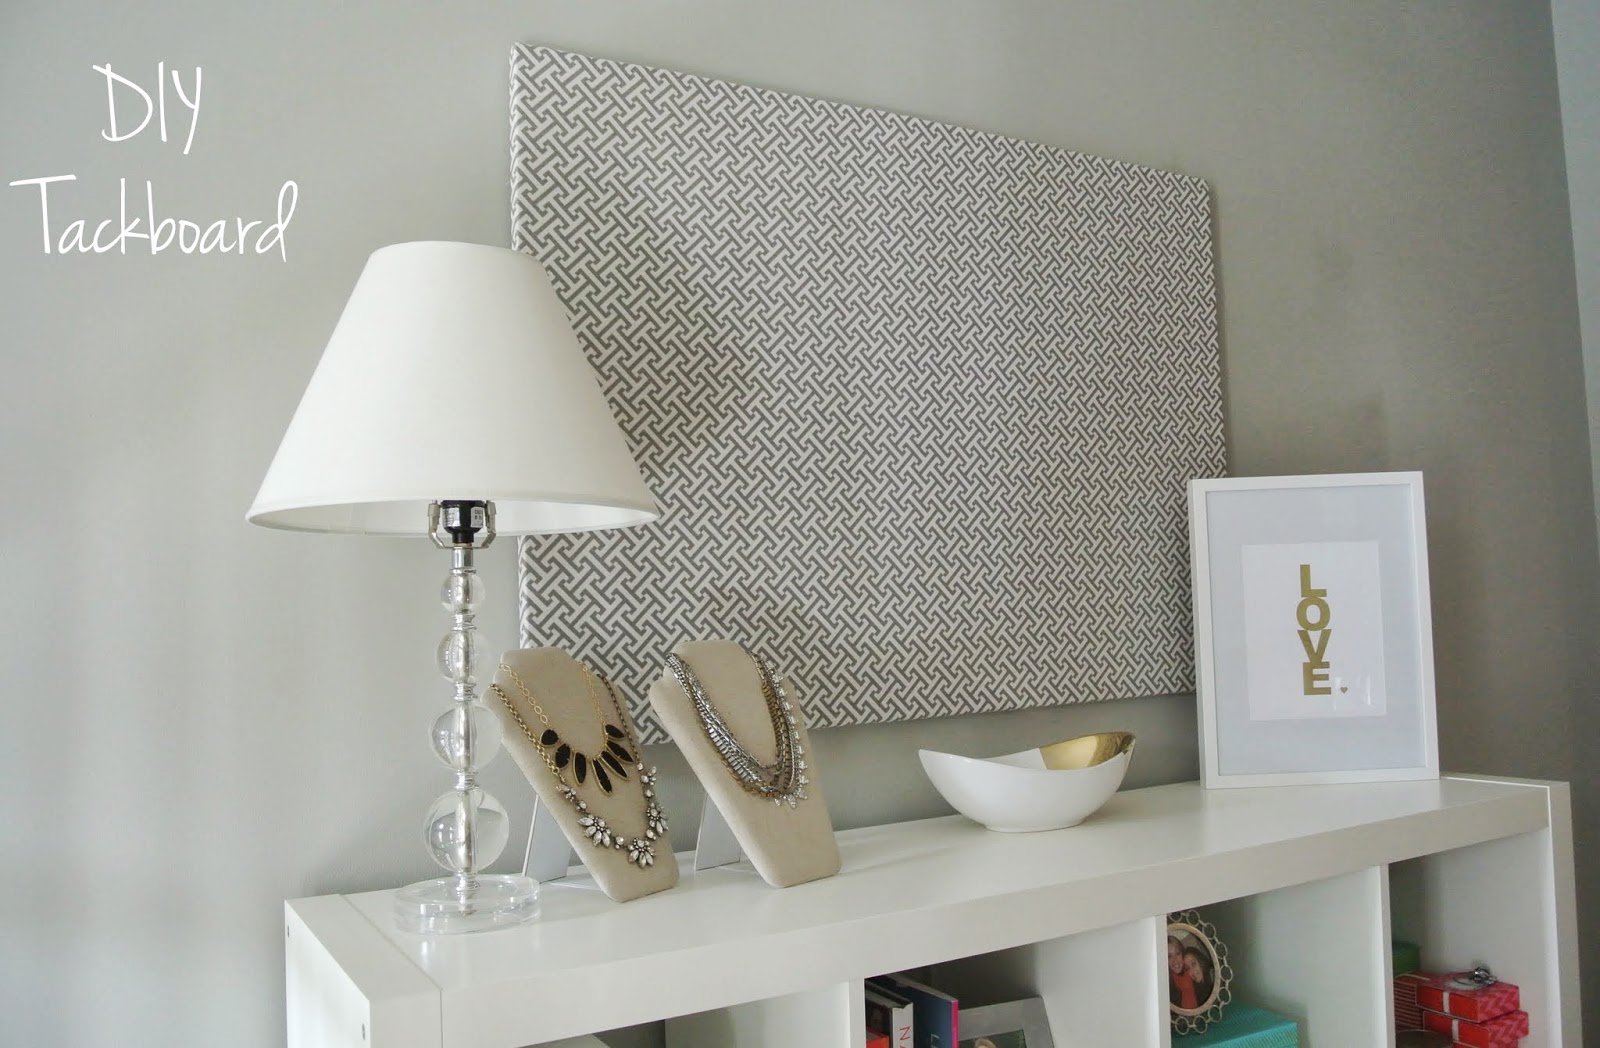
DIY Tackboard


After my last home office update post (here) I talked about how the one thing my office was missing was a tackboard.  Over the weekend I got my act together and finally made my fabric covered tackboard.  I am no DIY diva but this is super easy and only took me a few hours and its a lot cheaper than the other fabric covered tackboards I was finding.

First- get your supplies!


30" x 42" x 5/8" Plywood 
1 yard of Fabric- I used Waverly Cross Section in Charcoal 
(3) 4-Pack Cork  12" x 12" Tiles
Leveler
Staple Gun
Picture Hangers
Monkey Hooks


Start by applying all of the cork tiles to the plywood board.  I bought Gorilla Glue to stick the cork tiles to the plywood but when I opened the cork tiles they came with adhesive stickers!


Layout the fabric, flip the board so it is cork-side down and begin pulling up the edges tight around the board and stapling.


Attach two picture hangers at the top of the board- each one approximately 6" in from the edge of the board.


I hung the board using (2) Monkey Hooks which are rated to each hold up to 35 lbs.  After it was hung I lightly ironed out any wrinkles in the fabric


Once you have it hung give yourself a pat on the back and start pinning!


My home office is now complete... for the moment :-)


Linking this post on...

The Blissful Bee


Tuesday, April 2, 2013

Ikea Hack : Vittsjo Coffee Table

Pretty proud of my little ikea hack job on the Vittsjo coffee table today!  I got the idea when I saw the Vittsjo shelves that Tiffany at Meaningful Home gave a gold make over to!
via Meaningful Home
(I also bought the shelves and will be spraying them gold and putting them in my office) 

Anyways- I've been wanting a gold metal and glass coffee table for our living room for a while now but haven't found "the one".  I love the Clairemont from Crate and Barrel but it's too large for the small space.
Crate and Barrel - Clairemont Cofee Table

Then I found the Vittsjo coffee table from Ikea which is a perfect size for the space- 30" diameter.  So this weekend I got out the gold spray paint (actually, I don't think I ever put it away...)  It was super easy and for only $49.99 plus the cost of a can of spray paint it was a cheap fix!


Not too many pieces which is always a good sign- with Olive photobombing as usual.


I put together the table and then took it out to my spray paint lab garage.


I used Rust-oleum Pure Gold spray paint and primer in one.  I really liked the way it covered and the spray nozzle is so much easier to grip than the old school cans with the nozzle on top.  (again with the photobomb!)

I did 3 coats, waiting an hour or two between each one and then let it dry completely overnight.


I didn't use the bottom laminate base and instead just placed the glass back on top.


I am so happy with my new coffee table!  I'm thinking about using the mirror spray paint to spray the glass but I've never used it so I'm a little nervous.
Has anyone used it before and what did you think?


Monday, April 1, 2013

DIY : Decorative Letters


Hope everyone had a wonderful Easter!  I had a three day weekend so I decided to do a lot of little projects around the house that I had been wanting to do for a while.  I'm not a big DIY-er but I decided to give a few projects a try this weekend.  Today I'm sharing my gold decorative letters.  This is a super simple easy project.  Graphic lettering is really popular- whether it be using them in bookshelf stylings

via Lowes
or mounted on the wall in a gallery wall
via Project Nursery

When I saw Joann Fabrics had 12" Paper Mache letters on their website for only $4.49 each I decided to give it a try.


Next I set them up in my spray paint lab garage on top of plastic cups so I could get the sides and fronts completely.  If you are planning to use them in a styling rather than hanging them on the wall you'll want to wait til they are completely dry to flip them over and spray the backs.  I chose gold spray paint for this project.


After leaving the letters to dry a full 24 hours I cut slits in the back so I could hang them on the wall.  I measured to the center of each top and then used an Xacto knife to make an upside down triangle for the nails to mount to.  I started with just a small circle but found it didn't give me much wiggle room if my nail locations were off at all.


 I only used one nail for the A and used two nails for the K.  After some measuring and leveling the letters were up in no time!


I always thought the mirror above our bed needed "something" but couldn't decide what exactly it needed but I think the letters work perfect here!


And now there's no question whose side of the bed is whose! 


This week I'll be showing a few more DIY projects I did this weekend.  Let's just say I am dangerous when it comes to gold spray paint!


Monday, March 4, 2013

Gallery Wall Update

I did it!!  The gallery wall went up this weekend!  Here's a little play by play on how I did .
The gallery wall went in our front entry/living room area.


I started with a trip to IKEA and grabbed every size RIBBA frame they make in white and silver.  I got 2 or 3 of each size.  I knew I wanted to paint a few of the frames gold so I bought a few more white ones than silver.  I bought a bunch so I had plenty of sizes to choose from.  I also had two canvas wrapped pieces I wanted to work into the design as well.


Next I just started putting pieces down and moving them around- I tried to keep the sizes pretty mixed up.  I got to this layout first and I liked it but it felt a little too "orderly".


I only have 7 frames now but I wanted to have the option to add to it later.  I started moving things around again so that this time the frames weren't as lined up around the edges making it easier to add frames.


Once I had my final layout I took a photo of it with my iPad and kept it out as I started to hang the frames.  This made it easier for me to check back and see how I had originally lined things up. I've seen a lot of tutorials where you cut craft paper out to the sizes of the frames, tack them up first and then start hanging your frames to be sure you've got them exactly where you want them.


I'm a little impatient so I just started hanging them!


I grabbed the two small ones and spray painted them gold.  I might still spray paint the large horizontal frame to the right of the canvas wrapped photo.


Sorry about the bad lighting in the photos- I had run out of sunlight by the time I got to the end!


Ta-Da!  Here it is in all its gallery wall glory!  All of the RIBBA frames cost me less than $100 and they even come with a mat- such a great deal!  I'm still deciding if I want to add more frames above it and go closer to the ceiling but we'll see.  Now comes the tough part- picking what goes in the frames!


Thursday, February 21, 2013

O'verlays by Danika & Cheryle

I just found this website the other day and I am OBSESSED!  O'verlays is a company that makes all sorts of fretwork that you can add to basic IKEA furniture that makes it look amazing- for cheap too!  They've already taken all the measurements so you know they will fit to your exact door or drawer.  They also have a blog where you can see a lot of step-by-step directions and finished O'verlays projects!


Mirrored Malm Dresser


Ikea Expedit Bookcase


Pax Wardrobe- this one's insane!
Reminder- this is what Pax wardrobes start out looking like...


Love the metallic- that's the Xandra on a Malm.


And it's not just for furniture...

Here they used it on a door painted with chalkboard paint


I am in LOVE with this website and will certainly be trying some of their fretwork out around my house!
By the way- this was not a sponsored post, I'm just really that excited about it! :-)


Related Posts Plugin for WordPress, Blogger...